Wednesday, July 21, 2010

Good news and bad news

First the bad:

I had 3.5 inches of Alexandria done but now I have this much. . . .


The pattern near the bands was looking really strange so after much pondering and comparing the chart and instructions, I figured out that when I made a short-cut cheat sheet for the section I was doing I somehow copied the instructions for the section done in the round not flat. Der.

Last night I laid it out flat on my DR table and slowly and painfully ripped out 2 inches (sob!) then stopped 1 row above where I wanted to re-start. The next row I carefully un-knit 217 sts onto smaller needles. By some miracle I ended up with the same # of sts that I started with so I am good to go. . . . yet again. I called to tell my mom (also a knitter) my sad story and how stupid I felt and she said "well patterns are tricky". That made me feel better so thanks Mom :)


Now the good:

Error-free progress has been made on my niece's February Little Lady Sweater!


I'll see her next week so I can do a size check and if she's grown out of it just shoot me now.


Sunday, July 18, 2010

Ready for the magic

I finished the blue and white quilt this weekend so it's ready for my wonderful machine quilter Margaret to work her magic on! Here is a link to her blog with pictures of some the quilt's she's quilted. I am always amazed at the designs she comes up with.


But first here are pictures of a quilt she quilted for me last year using variegated thread:


the top pre-quilting


one section post-quilting


the center medallion


and the back which really shows it off.


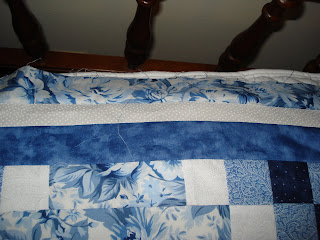
And here are pictures of the finished blue and white quilt now with borders! And I didn't have a brain freeze when I measured the borders. Since my bed is fairly high off the ground, I wanted the sides long enough so that I could see the cherry side rails but I also didn't want a pillow tuck. In the morning I pull the sheet and quilt up then throw the pillows on top and head out. I think white pillow cases with eyelet trim would look nice with the top.

Click on pictures for a larger view:

on my LR floor


view from the side of the bed - I had to use the flash since it was cloudy.


View at the head of my bed.

Saturday, July 10, 2010

location location location

Since I hadn't started my blog back in April when Eskimimi did her Knit and Crochet blog week and location was one of my favorite topics from that week, I thought it might be fun to post pics of where I sit and sew.

Here is my recliner which was given to me by dad as it didn't fit in their house when they moved to Va. When he visits he sits in it :) I love it! It's the most comfortable chair ever and I dread the day I'll have to replace it. Since I eat most ok all of my meals in it, I put a soft fleece on it I picked up at the grocery store of all places. I learned from my mom it's much easier to wash a blanket than a chair.


I keep a basket by my chair and it holds my WIP, patterns, and various knitting tools. The chest with all the drawers was given to my mom by her dad when she was in 7th-8th grade to hold her sewing supplies. She'd just taken home ec and loved it (she taught me to knit and sew). It has funny drawers that don't slide in and out you just stick them back in. Each drawer held spools of thread of a similar color. I've taken over a few of the drawers but the rest I've left as is to remind me of my my mom sewing when she was young.


Here is a picture of my DR table where I sew - I pop the leaf up when I need more room for a big quilt:


My townhouse is built on the side of a hill with a deck off the back. My DR (and kitchen) face a walking trail and I love to watch people walk by as I sew, cook etc. Here are pictures of the view out my DR window:


And the view from my kitchen window (this is also what I see from my recliner):


And a picture taken from my deck:


Wednesday, July 7, 2010

Lost and Found: Motivation


Due to my excitement to finish CPH and start Alexandria, my enthusiasm to work on my niece's February Little Lady Sweater has waned. Here is what it looked like back in mid-May:


Since I'm heavily modifying the pattern and I was about to visit her in Ga for her 4th b-day I wanted to get it to the point where I divided for the sleeves. I did and thankfully it looks like it will fit perfectly! Phew. She was a trooper and stayed still while she tried it on and I did some measuring. Not easy for an active 4 year old.


Over Memorial Day weekend I divided for the sleeves and did a few rows and it's been sitting untouched since then.

After having to CO for Alexandria 5 times (I'm now up to 1075 sts!), I think I'll take a break for a few days and work on FLL. My sister sent me this picture of my niece yesterday which was just the motivation I needed! Is there anything more precious than a picture of a sleeping child?


She's holding a UNC bear I gave her a couple of years ago in my quest to brainwash I mean convert her into a UNC fan.


And here's a picture of her learning to knit with me taken a few months ago:


I just love her little hands next to mine.


Saturday, July 3, 2010

Pretty in Pink

Yesterday I swatched for the Alexandria cardigan:


I'm using the yarn/color suggested in the pattern Fleece Artist Woolie Silk 3 ply (65% wool, 35% silk)/ rose which is not very adventurous but hey why mess with something that already looks great. On size 6 needle I got 5.5 sts/inch and I need 5.0 so I went up to a 7 and that worked. I liked the look of the sts better on a 6 and the size I'm making may be a tad big so I considered using a 6 but I'd like my sweater to close in front and not gap like is shown in the pattern and several others on Ravelry so I'm sticking with a 7. Who knows if this will work. Gauge is always such a crap shoot...

Next time trust the math

Friday I had a couple of free hours so I sat down to knit the buttonhole row on my CPH. I got out my copy of this nifty book my mom gave me for Christmas because it has a handy chart for calculating the placement of the holes and my print out of one-row buttonhole instructions. Next I carefully calculated the placement of the holes:

1. Calculate the # of sts used for the holes: 4 sts x 5 buttons = 20sts

2. Deduct this from the total # of sts in the band: 138-20 = 118

3. Deduct sts above the top and bottom hole (I had the collar sts to account for so top was 24 sts and bottom was 6 sts): 118-30 = 88

4. Divide the remaining sts to fill the spaces between the holes (5 buttons = 4 spaces): 88/4 = 22

Per the instructions I started at the bottom of the band and after making the first hole, knitting the sts in between the holes then I thought I'd better check and see if I was going to end up at the right place for the last hole. I was worried it might end up smack in the middle of the collar. I measured and fretted and decided I had too many sts between the holes so I'd better go with less. For some unknown reason I went with 15 sts between holes. I could see going with 1 or 2 less but 7 less? I have no idea what I was thinking. But I carried on and ended up with 6 holes instead of 5 and it looked like this:


Not really the look I was going for - the buttons look too crammed together. So I ripped back to the sts after the first hole which was not fun as I had to unpick the cast -on/off sts around the holes and luckily I ended up with same # of sts as when I started. I did some more calculations and measuring based on the row I just did and I ended up with wait for it..... 22 sts between the holes! This is how it looks now - much better:


Click to enlarge

Der... next time I'll go by the chart!